
Tissue Pomanders Directions
Materials Needed
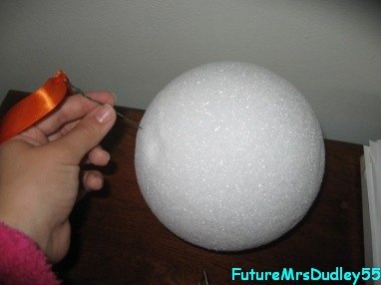
- A styrofoam ball (I used a 6" ball)
- Tissue paper
- Floral wire (I used 24 gauge)
- Ribbon
- Scissors or paper cutter (I found scissors to be easier because the tissue paper kept getting stuck in my paper cutter)
- Optional - Hot Glue and Hot Glue Gun
Step 1
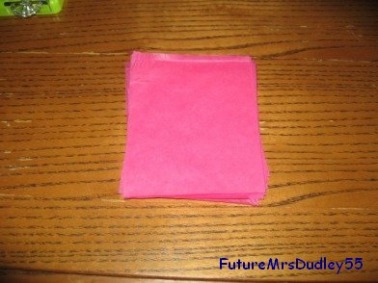
- First, you need to cut your tissue paper to your desired size. This was the step I had the most trouble with because I had to try multiple sizes to find the right one. If you want to know what size I used and how I got them to that size just page me on the P&E board.
- Now, after you have your desired size, use 5 (or 6, depending on how much texture you want your flower to have) pieces of your newly cut/sized tissue paper and stack them, like shown in the picture.
Step 2
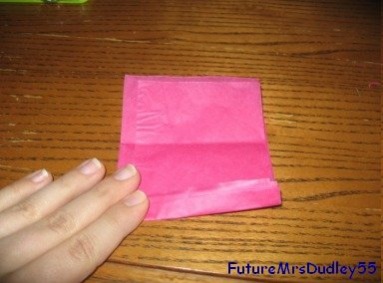
- Now take your stacked tissue paper and begin folding it back and forth, like an accordian.
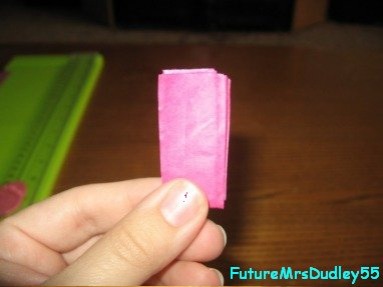
Step 3
- Fold your accordian in half.
Step 4
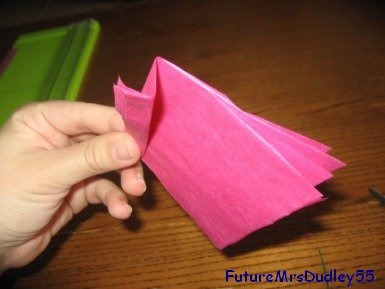
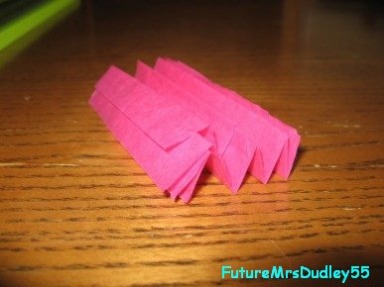
- Now, take your scissors and round off the edges of your paper. This step is crucial if you want your flowers to look more realistic. I made a flower once without rounding the edges and it looked awful. So make sure to round off the straight edges!

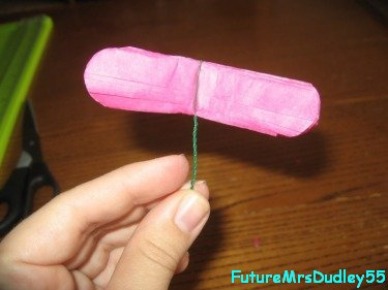
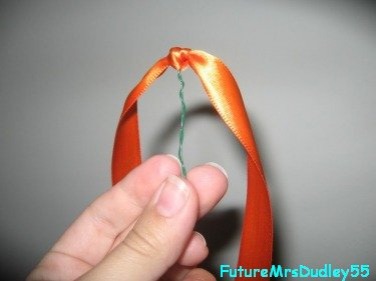
Step 5
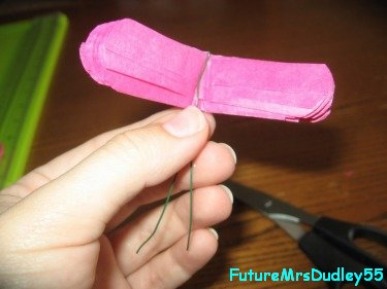
- For this next step, you will need some floral wire. The wire will hold your flower together, as well as serve as its stem so that it can be inserted in the styrofoam ball.
- When determining how much wire you need, just keep in mind that a little goes a long way. After you've cut your desired length, fold the wire in half and insert your tissue paper in between. Your fold from before will serve to be beneficial here because then you will have it centered more properly.
- Now twist your wire ends together to make a stem.
Step 6
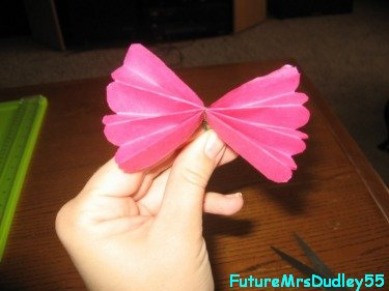
- Fan out your accordian folds.
Step 7
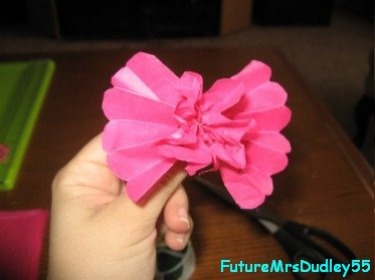
- Now, gradually divide each tissue paper layer individually and fan them out. It's best to fan each layer separately and to do so very carefully as to not to rip the paper.
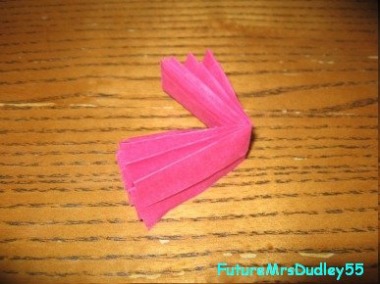
A Finished Flower
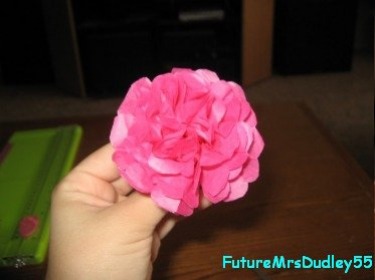
- A completely fanned out flower. Ain't it purty?
Step 8
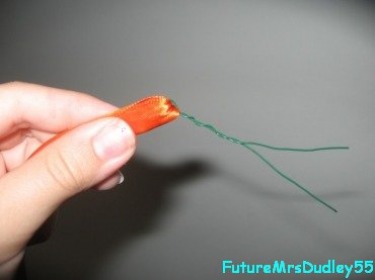
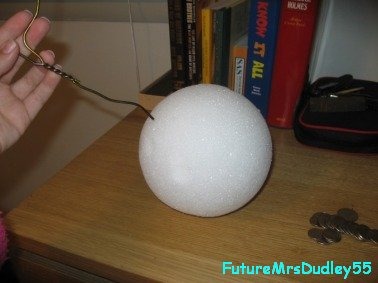
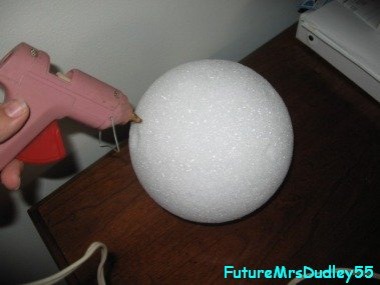
- Now, we need to insert the ribbon into the styrofoam ball. Cut your desired length of ribbon. Then cut a piece of floral wire and fold it in half. Place your ribbon in between and even it out so that before you twist your wire that the ribbon will be even on both ends. I found that after twisting the wire, to secure my ribbon better, I tied a small knot.
- Eithering using your floral stem (I used a wire hanger) or something strong to make a small hole, punch a hole into your ball and fill it with hot glue. Then immediately insert your floral stem.
- The hot glue it optional, but I wanted to make sure that my ribbon would stay put since it will be hanging for a long period of time. So the hot glue ensures that.
Step 9
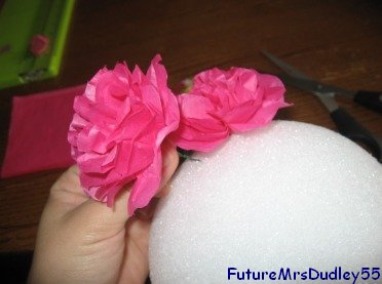
- Stick your flower into your styrofoam ball. This step can be tricky because it needs to be inserted without damaging the flower. I found by placing one finger inside the flower to reach the wire, and pushing it down helps a lot without hurting the flower much.
The Final Product
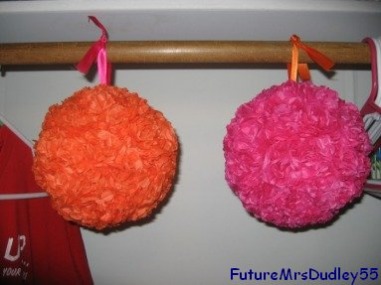
- All done! Now for my advice:
- Don't worry if ALL of the flowers aren't perfect because they are being bundled together and it will be unnoticable.
- Don't use long pieces of wire because the longer they are, the more that you have to push into the styrofoam ball and it can be a PITA. So a little goes a long way.
- As mentioned, I prefer using the hot glue to secure the ribbon in place, and I'm glad I did!
- If your stack of tissue paper isn't exactly even, don't worry about it. Or even if your sizes of paper don't match 100%, don't worry about it.
3 comments:
Woohoo! They look awesome.
Okay... I am totally making some of these.
They look amazing!
How are you attaching these to... whatever you are attaching them to? Best wishes in your last few days before your wedding!
Post a Comment