Tuesday, December 29, 2009

Guest Book - Check!

This has to be one of my most favorite projects that I've completed. Since I bought my dress and bridesmaid's dresses through David's Bridal, I received a code for shutterfly.com to create a free 8x8 photobook. I decided to take this opportunity to create a photo guest book that incorporates our engagements pictures into the book! Here are samples of photobooks from shutterfly.com:


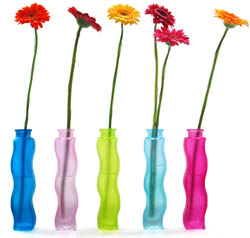
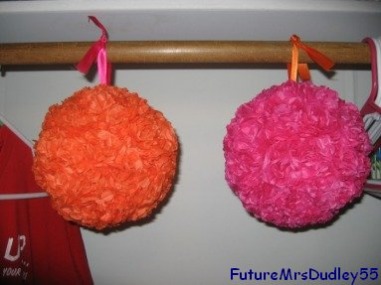
Here's a glimpse of how ours turned out!


Vases! Vases! Vases!

In my hometown, we are lucky to have a glass factory that is open to the public, where glass items, candle etc. are sold very cheaply. So my fiance and I made a trip to check out vase possibilities for future DIY projects.

Here is what we came up with (potentially) for centerpiece vases:


I knew I wanted square vases of some sort, but a little taller than my inspiration centerpiece that I found online. So I'm hoping to take these and turn them into something like this:


Next, I plan on displaying a memorial table for loved ones that are no longer with us. I wanted to honor them by making memorial candles for each person. I found these that we plan to frost:


I want to take these small vases and turn them into memorial candles like these:
                                                            http://www.franscandles.com/memorial%20candle%20images/memcansessums1.jpg
The candle will be submerged into the vase, and I will border the picture with ribbon instead.

Lastly, I wanted to find vases to hold single-stemmed gerbera daisies that will be displayed behind the memorial candles. We found these:

I LOVE these! They were 2/$1.00 and so unique. I bought ten of them to line the back side of the memorial table and I want to put a single gerbera daisy in each with colored water. Basically I want to incorporate the ideas below:


Picture

I can't wait to run trials of these and get started!

The beginning of my programs!

Hello everyone! I've taken on another project for the wedding, so I haven't been posting as much, but I would like to share what I've been doing with everyone! Since our wedding ceremony is being held outside in a garden, I thought it would be best to make the ceremony programs into paddle fans. I'm also making twice as many programs than a typical person would make because I felt it was important to make a fan for each seat so that everyone would have the opportunity to use a fan and not have to share. So I'm making 120 of these bad boys. Here's what I've been doing:

These are the supplies that I've been using to create the programs. I wanted to spray paint the wooden sticks, but I found it nearly impossible to find my colors in spray paint. The closest I came to find tangerine and hot pink in spray paint was fluorescent spray paint, which I didn't care for. So I'm taking on the task of hand-painting each stick, front and back.

Supplies Needed:
  1. Acrylic paint
  2. Wooden craft sticks
  3. Wax paper
  4. Acrylic paint brush
  5. Card stock (later on)
  6. Adhesive (later on)
  7. Ribbon (optional)
I bought all of my materials at Hobby Lobby. You will want a nice large flat surface to work on. My fiance suggested using wax paper since the paint from the sticks won't stick to it as it is drying. I've lined my area with wax paper (2 areas for drying and 1 area for painting). This can be time consuming if you plan to go the route that I am, but overall, if you have a day where you have nothing to do, these can be painted easily over a couple of hours.

Here you can see how I utilized the areas on my flat surface. Aren't they fun!?


As you can see, I still need to paint some more and fill in areas on the sides of the sticks. I can't wait to show everyone how they turn out once they're done! More to come later on once I'm finished painting!

Friday, December 25, 2009

MERRY CHRISTMAS!


Merry Christmas everyone from the DIY Bride! For now.. I leave you with pictures of my beloved pets. =) Have a great day!

Thursday, December 24, 2009

How to make tissue paper pomanders

Here are my directions for making the tissue paper pomanders. Sorry about the formatting! I copied it straight from my Wedding Planning Bio website.

Tissue Pomanders Directions

Materials Needed

  1. A styrofoam ball (I used a 6" ball)
  2. Tissue paper
  3. Floral wire (I used 24 gauge)
  4. Ribbon
  5. Scissors or paper cutter (I found scissors to be easier because the tissue paper kept getting stuck in my paper cutter)
  6. Optional - Hot Glue and Hot Glue Gun

Step 1

Picture
  • First, you need to cut your tissue paper to your desired size. This was the step I had the most trouble with because I had to try multiple sizes to find the right one. If you want to know what size I used and how I got them to that size just page me on the P&E board.
  • Now, after you have your desired size, use 5 (or 6, depending on how much texture you want your flower to have) pieces of your newly cut/sized tissue paper and stack them, like shown in the picture.


Step 2

Picture
  • Now take your stacked tissue paper and begin folding it back and forth, like an accordian.

Picture
Picture

Step 3

Picture
  • Fold your accordian in half.

Step 4

Picture
  • Now, take your scissors and round off the edges of your paper. This step is crucial if you want your flowers to look more realistic. I made a flower once without rounding the edges and it looked awful. So make sure to round off the straight edges!

Picture

Step 5

Picture
  • For this next step, you will need some floral wire. The wire will hold your flower together, as well as serve as its stem so that it can be inserted in the styrofoam ball.
  • When determining how much wire you need, just keep in mind that a little goes a long way.  After you've cut your desired length, fold the wire in half and insert your tissue paper in between. Your fold from before will serve to be beneficial here because then you will have it centered more properly.
  • Now twist your wire ends together to make a stem.

Picture
Picture

Step 6

Picture
  • Fan out your accordian folds.

Step 7

Picture
  • Now, gradually divide each tissue paper layer individually and fan them out. It's best to fan each layer separately and to do so very carefully as to not to rip the paper.

A Finished Flower

Picture
  • A completely fanned out flower. Ain't it purty?

Step 8

Picture
  • Now, we need to insert the ribbon into the styrofoam ball. Cut your desired length of ribbon. Then cut a piece of floral wire and fold it in half. Place your ribbon in between and even it out so that before you twist your wire that the ribbon will be even on both ends. I found that after twisting the wire, to secure my ribbon better, I tied a small knot.
  • Eithering using your floral stem (I used a wire hanger) or something strong to make a small hole, punch a hole into your ball and fill it with hot glue. Then immediately insert your floral stem.
  • The hot glue it optional, but I wanted to make sure that my ribbon would stay put since it will be hanging for a long period of time. So the hot glue ensures that.

Picture
Picture
Picture
Picture

Step 9

Picture
  • Stick your flower into your styrofoam ball. This step can be tricky because it needs to be inserted without damaging the flower. I found by placing one finger inside the flower to reach the wire, and pushing it down helps a lot without hurting the flower much.

The Final Product

Picture
  • All done! Now for my advice:
  • Don't worry if ALL of the flowers aren't perfect because they are being bundled together and it will be unnoticable.
  • Don't use long pieces of wire because the longer they are, the more that you have to push into the styrofoam ball and it can be a PITA. So a little goes a long way.
  • As mentioned, I prefer using the hot glue to secure the ribbon in place, and I'm glad I did!
  • If your stack of tissue paper isn't exactly even, don't worry about it. Or even if your sizes of paper don't match 100%, don't worry about it.


Tissue Paper Pomanders - Check!

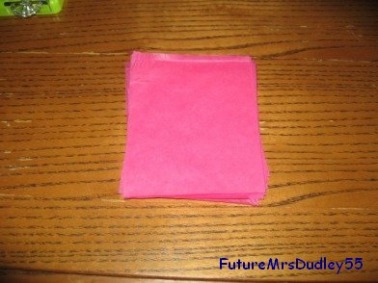
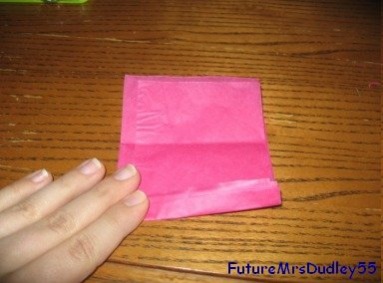
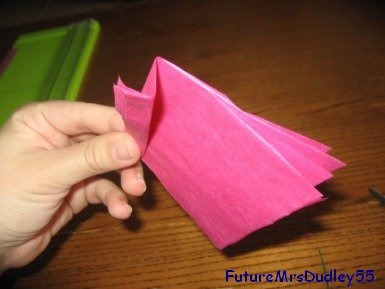
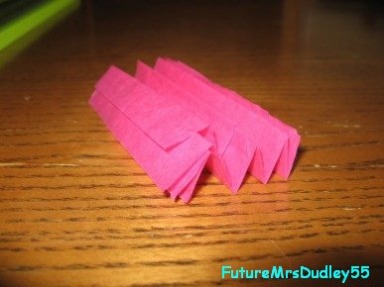
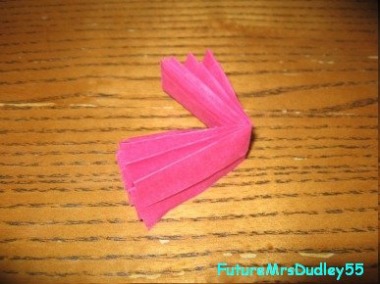
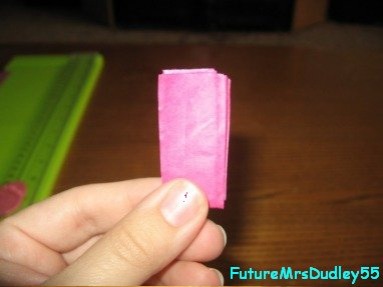
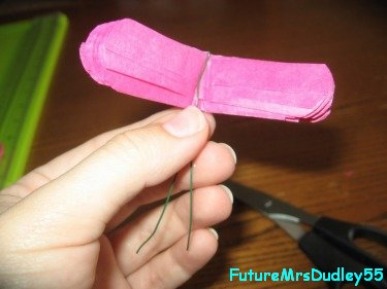
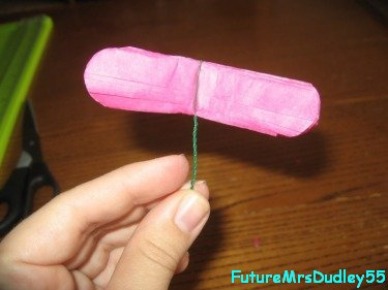
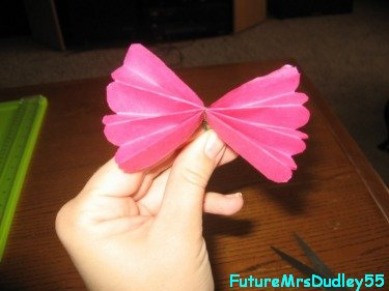
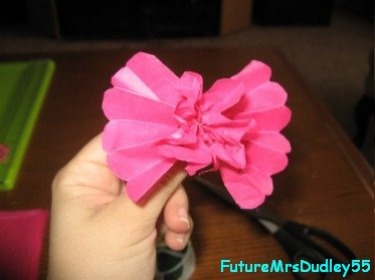
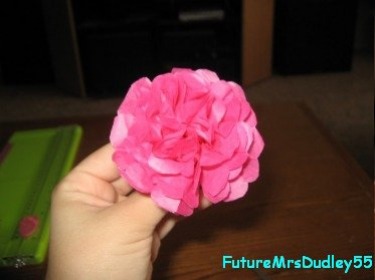
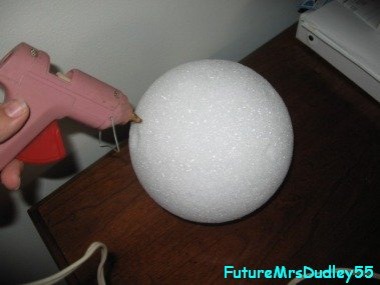
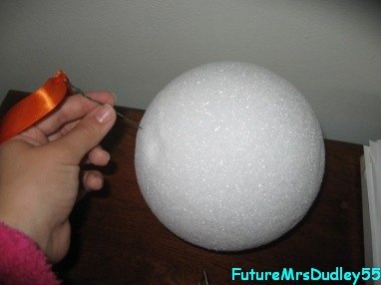
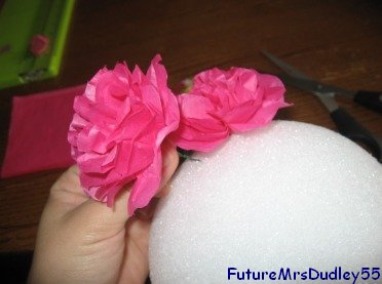
Starting these pomanders was my first DIY project that I ever started for the wedding. I decided to start on them about a year out because I knew they would be time consuming. I've since removed all the flowers from the balls because I've decided that actually fanning out the flowers so far in advance doesn't make the pomanders look as good as they should. In my case, we had to move them around a lot so flowers kept getting smashed. So I've been making the flowers, but I haven't been fanning them out. I plan to fan them out about one week prior to the wedding to have them looking their best. I'll be posting my directions next on how to make these!

Wednesday, December 23, 2009

Crinoline - Check!

Another DIY that I was
able to complete was my crinoline. I wanted to dye it hot pink and to be honest, this was the DIY project that I've been to most nervous about because I was afraid that I wouldn't get the color right. It turned out great! I dyed it in this plastic tub.

Materials Needed:
  1. RIT dye
  2. Crinoline
  3. Salt
  4. Hot water
  5. Tub
  6. Rubber gloves
  7. Fabric sample (optional)
Directions:
  1. Fill tub with enough boiling hot water to cover the entire crinoline once submerged. The hotter the better.
  2. Follow the instructions on the RIT dye for adding to the water, in terms of dye needed and salt needed.
  3. Wearing your rubber gloves, mix the dye around with your hands to make it even throughout.
  4. At this point, I wanted to test the color so I had previously bought a small piece of nylon and a small piece of tulle to test.
  5. I dipped in my sample and mixed it around for a few minutes. Then, I adjusted my amount of dye. (In my case, I felt that it was too light pink, so I added more dye to the water.)
  6. I tested one more piece of fabric and it came out to the perfect shade for me, so I was ready to add my crinoline.
  7. Now comes to hard part.. add your crinoline to the water-filled tub and begin mixing it around in the dyed-water like a washing machine would. You will want to do this for at least 25-35 minutes, depending on the color you're trying to achieve. I wanted mine darker, so I mixed it around for roughly 35 minutes.
  8. Keep in mind that you want the color to evenly distribute throughout, so you may need to gradually pull the fabric away from other fabric since they could potentially stick together.
  9. After 25-35 minutes, rinse the crinoline with cool water until the water runs clear.
  10. Voila! Hang the crinoline up to dry and you're done!
Tips/Advice:
  • Pick a good place to dye your crinoline. I chose the bathtub because I knew that water would more than likely spill out, but keep in mind that mixing the crinoline around for that long, being bent-over or hanging-over the tub REALLY kills your back. Choose wisely!
  • I recommend buying sample fabric from your local crafts/fabric store that is the same material that your crinoline is made of. Mine is made of nylon and tulle, so I bought samples of nylon and tulle to see how well the dye would hold the dye.
  • Use the hottest water that you can.
  • Buy good, thick rubber gloves. I bought some from Target that reached mid-forearm. and that were very thick. But when I had to dip my crinoline in further into the water, the water would spill into my gloves, which hurt like hell. So you may want to invest in longer gloves. But make sure they're good enough to sustain high heat and water!
Good luck! If you have any questions, feel free to ask!

Cardbox - Check!


With my semester over, I have a lot more free time to work on projects for the wedding. I was able to finish my cardbox!

Invitation supplies arrived!


I ordered my pocketfolds, invitation envelopes, and RSVP envelopes from cardsandpockets.com. I highly recommend them! They're so easy to work with and occasionally have sales, so I suggest signing up for their newsletters so you won't miss out. I bought all of my materials during their 25% sale, so for 45 pocketsfolds, 45 envelopes and 45 RSVP envelopes.. I roughly spent about $60. Also I bought all of my cardstock from Hobby Lobby during their 50% off scrapbook paper sale. So I was able to buy all of the cardstock needed for invites, programs, table numbers, menus and escort cards for about $12. Not bad!

What I Ordered/Bought:
  • Sand Metallic Pocketfolds (cardsandpockets.com)
  • Watermelon Euro-Flap Envelopes (cardsandpockets.com)
  • Watermelon RSVP Envelopes (cardsandpockets.com)
  • Hot Pink Cardstock (Hobby Lobby)
  • White Cardstock (Hobby Lobby)
I plan to emboss the UpsyDaisy! stamp on all of my invites, so be looking for my post about embossing in the near future!

Tuesday, December 22, 2009

My First Post

Hello! Welcome to my blog! Through this blog, you will be able to experience, learn and view all of my plans for my upcoming wedding on June 12, 2010. I'm a DIY bride, which means I plan to complete a lot of Do-It-Yourself projects for my wedding, as well as offer directions on how to complete these projects on your own! I hope you enjoy following my blog!

The List:
  1. Invitations
  2. Programs
  3. Menu Cards
  4. Escort Cards
  5. Table Numbers
  6. Reservation Cards
  7. Card-Box
  8. Guest Book
  9. Centerpieces
  10. Memorial Candles
  11. Thank You Parasol
  12. Dying the crinoline
  13. Tissue Paper Pomanders
  14. Wooden Wedding Signs
  15. MISC.!
Here we go!
Related Posts Plugin for WordPress, Blogger...