Saturday, April 10, 2010

Photo Stamps!

Finally! A new post! This isn't so much a DIY project since all I really did was just upload a photo, but none the less, I present to you all.. my envelope photo stamps!


Snapfish was having this awesome sale on photo stamps a few days ago, and I was able to get these stamps for $.35 cents each (Thanks Ashley!) after all of the discounts came through. Love them!.

Thursday, April 1, 2010

Venue Issues!

Ughh.. my least favorite part about wedding planning is when things don't work out the way they're supposed to. I've been wanting to share more DIY projects with you all, but we hit a major snafu in our planning this past Monday and I've been too stressed out to work on anything. Basically what happened was..

Our original venue was going to be used for both the ceremony and the reception. When we booked them, they informed us of an approved list of caterers that they provide to all of their couples, however if we weren't able to use any of them or if we just wanted to use someone else, we could. We just had to have them approved and have the restaurant/catering company fax their proper paperwork over to our venue. Awesome. No problem right? Well this past Monday, I decided to email the Events Coordinator at our venue to check in on things and to see if our caterer that we had booked had contacted her yet. She replies with this.. "In the Fall, we sent out an email or letter to all of our 2010 brides, letting them know about our new catering policy. The approved caterers on our new list are the only caterers we allow to cater here now." WHAT?! I never received an email or a letter, and I sent her an email telling her this. This hasn't been the first time that our venue had done something like this and to be frank, they have been awful to work with. So basically, the caterer that we booked and paid a deposit for already was no longer usable.

That was the last straw for me. My fiance was very upset. It wouldn't have been such a big deal if we hadn't found such an awesome caterer that fit into our budget wonderfully, and if the approved caterers list had been condensed since we received our copy of it at our contract signing. Plus, 2 of the caterers are already booked, and 1 of them has a conference on our wedding day. So that basically left us with having to use our venue as our caterer at roughly $21.99-$25.99 per plate on top of a 18% gratuity. Not budget friendly at all. So I was talking to my mom and my older brother about our dilemma, and my brother says, "A friend of mine is the owner of a local reception banquet hall here in town. I could give him a call and see what he could do." Well as luck would have it, the couple that had June 12 booked at his reception hall had canceled their wedding because they broke up that very day about 4 hours prior. So we arranged to go see it the following day (Tuesday). The owner was such an awesome guy, and VERY accommodating. He understood our issue and since he knew my brother, he knocked off $1000 of his Platinum Package deal, which include a DJ, linens, a caterer, day before set-up, next day accommodations, free security, dressing rooms.. I could go on and on. Plus the banquet was sooo nice! Way nicer than what we had booked for our reception already. So my fiance and I booked it.

Now we were at 2 reception venues, 1 ceremony site, 2 DJ's, and 2 caterer's. Oh boy. So yesterday afternoon, my fiance and I decided to perform negotiations and damage control. Basically we still wanted to be married outside, which we still had at our orignal venue. First, I took care of our originla DJ. We never signed a contract with him or gave him a deposit, so that would be the easiest to cancel first. He totally understood our situation, and we ended things on great terms. Now between our prevous caterer and our original venue, my fiance and I decided to each take one. I decided to call the venue, and he took the caterer. We never signed a contract with the caterer, but we did give him a $150 deposit. As luck would have it, he was awesome about the situation as well, and my fiance drove over there today to retrieve our $150. Score! I contacted the supervisor at my original venue. Basically the cost breakdown was as follows: The outdoor ceremony garden cost $500, and the indoor reception room was $400 to rent. So when we signed the contract, we were required to put down half ($450).

I called up the supervisor, and basically just told her due to what we learned on Monday that we decided to switch to a new reception venue since it was a lot cheaper (and a lot nicer, but she didn't need to know that =)). Then, I told her that I was hoping we could negotiate us just using the outdoor ceremony site, and to cancel the indoor reception room. She followed up with, "So you've probably paid $450 already correct?" I told her yes, and I waited for her answer. A few moments later, she replied, "Sure! That is no problem at all. We won't charge you for cancelling the room." What!? Seriously?! No penalty? Nothing? In our contract, it states that if we cancel a site on their property with more than 31 days before the wedding that we would be required to still pay half of the room rental's fee, which would have been $200 since the indoor reception room rents for $400. But she was very nice and understood how the caterer situation kind of put us in a tough position. So she just simply asked if she would be allowed to release the indoor reception room for another couple to rent, and I told her absolutely, and she told us that we just owe $50 to cover the remaining cost to rent the outdoor ceremony space, as well as the rental fee of the chairs that we will need (which we knew about from the beginning.)

So in the end.. everything has worked out!! I couldn't be happier. Now back to those invitations..

Saturday, March 27, 2010

Invitation Re-Design!

So last week, I was on Excel checking out my guest list for the wedding. I had inserted a formula a while back to count up how many invitations that I needed to make. The total came out to be 39 invitations total. So I made 39 invitations. Well last week, I decided to reprint my guest list and count up by hand how many invites I needed, and I actually need 58 invitations. CRAP. I should have done it that way from the beginning and I still have no idea how Excel came up with 39 invites. So basically, earlier this week, I needed to get started on embossing 20 or so more invites. I was doing them, and was about to start my 5th one when I caught myself looking at them, and I was unhappy. I want to be proud and happy about our invitations. I know they're just going to be thrown away by our guests, but I want to keep a few of them and frame them. I want to look at them 10, 20, 30 years from now, and still love them. So on Wednesday of this week, my fiance and I went out to Hobby Lobby in search of some inspiration. Some things we wanted to keep the same still..

What we kept the same:
  • The hot pink invitation envelope
  • The hot pink RSVP envelope
  • The sand metallic pocketfolds
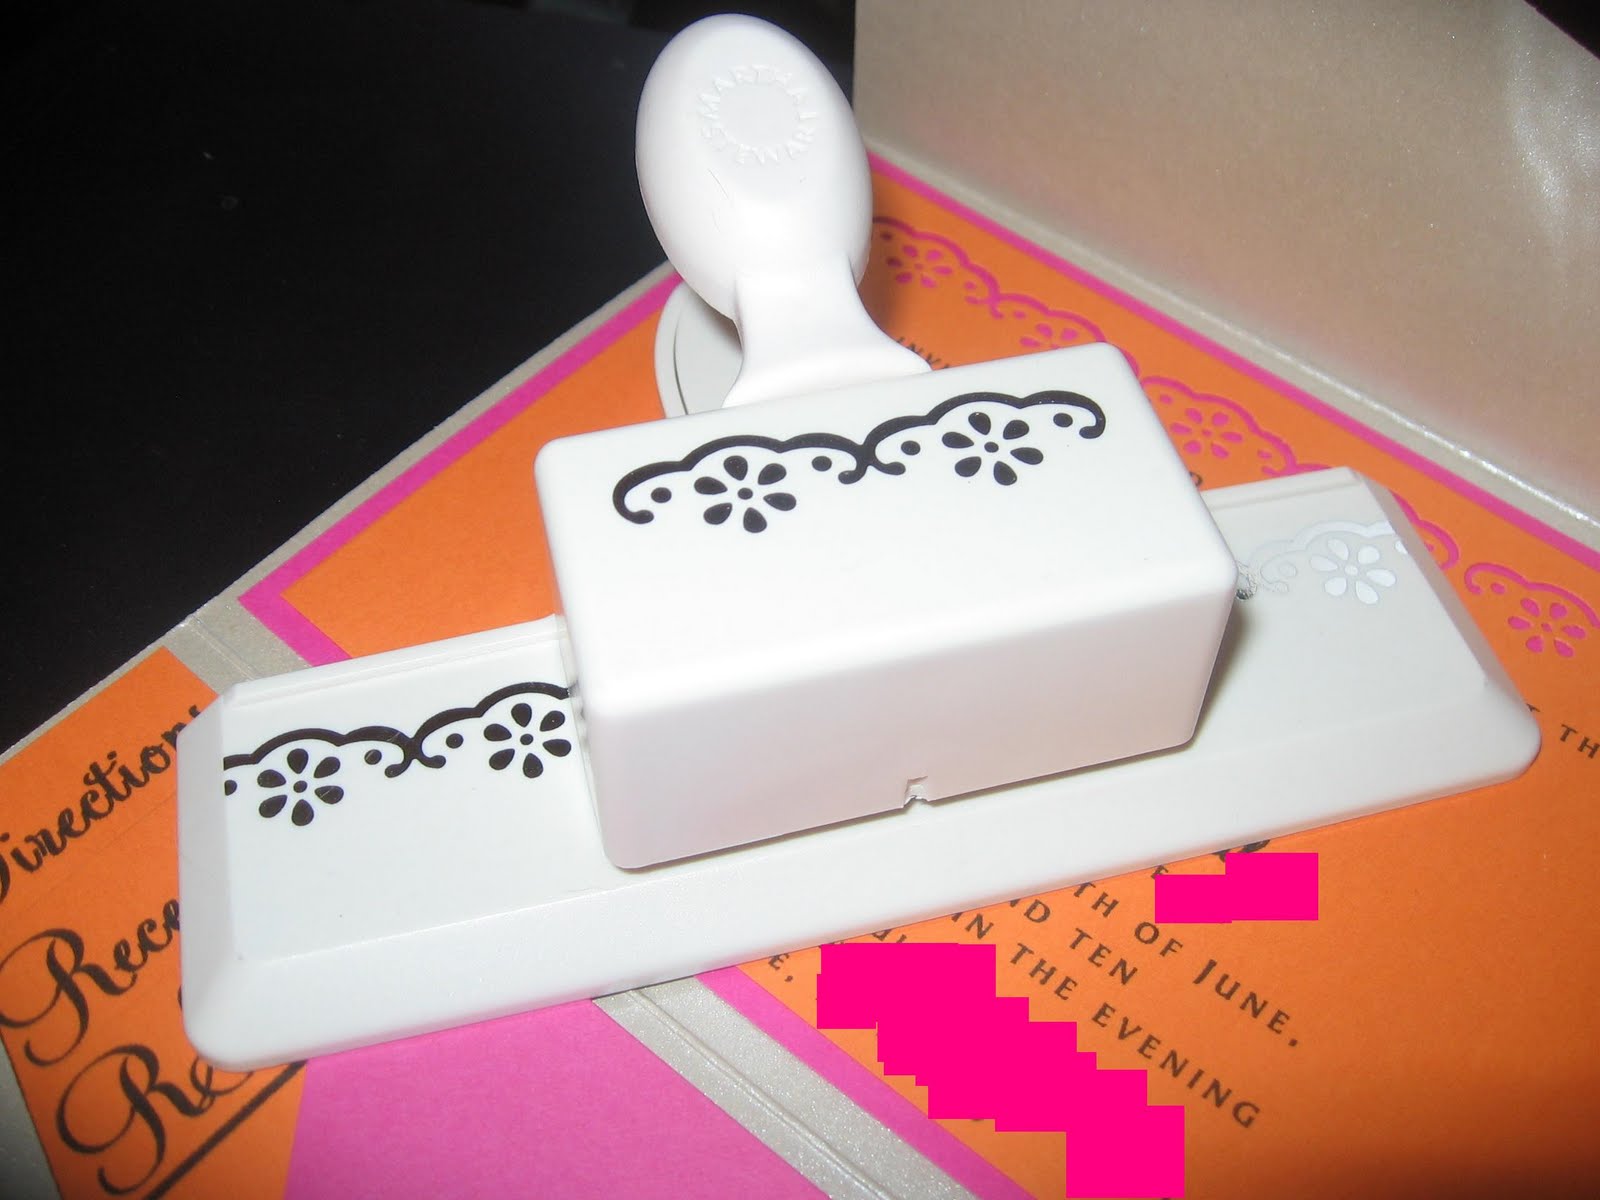
My fiance actually ended up finding our new inspiration for the invites, which was a flower border paper punch. And now I present, our new invitations!


Honestly, these pictures do them absolutely no justice whatsoever. But in person, they are absolutely gorgeous and I am so happy with them! I feel like this huge weight has been lifted off of my shoulders because down deep, I still didn't want to use the other invites, but since I put some much time, money and effort into them.. I was just going to settle. My advice: DON'T SETTLE! Take pride in your work, and be happy with your results. You don't want to have any regrets about your projects. So how do you like them!?

PS. I love how our new paper punch incorporates flowers that are almost identical to the fondant flowers that we are going to create for our cake!

Wednesday, March 24, 2010

Made a Huge Decision Today..

After embossing and assembling about 70% of our invites, I have made the decision to change them. I basically stuck with them this long because I had put so much work in them, but when I looked at them and thought about them, I wasn't happy at all. Sure, they're just going to be thrown away, but I want to be happy and proud of them. Plus, I plan to keep a few of them for a shadow box project after the wedding, and I want to look back at them years from now and still love them. So my fiance and I just spent the past hour in Hobby Lobby looking for inspiration, and my fiance found something that we both love. Maybe now I will actually be happy and excited to complete our invitations instead of just staring at what we have now and not wanting to finish them at all. I'll have a mock-up to show you this weekend!

Monday, March 22, 2010

Revision of the Table Numbers.. Check!

My fiance found these adorable photo holders at Hobby Lobby marked 40% of $1.67, and since we loved them, I knew that my original table numbers weren't going to work as well. Here is what we plan to do now!
It is kind of hard to tell, but what I actually did was enlarge some numbers in a Word document to 200 and print them off. then I took some scissors and cut out the numbers. Then, I printed off one of our engagement pictures. I taped the number backwards on the back of the photo, and cut around it with a box cutter. Then, I taped a small piece of orange cardstock behind it then glued the whole thing to a piece of hot pink cardstock. I will post actual directions once I get started on making more of them! 


In this last one, you can kind of see where the photo is separate from the orange paper and where I cut.

Escort Card Table Centerpieces - Check!


Yesterday was a pretty low key Sunday, so I took the time to complete my first of three escort card table centerpieces. I plan to make one more hot pink one and an orange one. Have a look!


And here is my dog, Liberty, begging me to stop with all the wedding stuff and pay attention to her..

Bride's Bracelet - Check!

I had some left over glass pearls after making the pearl necklaces for my bridesmaids, and I wasn't looking to spend a lot of money on something that I would only wear for one day, especially since I never wear bracelets. I'm not wearing a necklace for the wedding and I bought my beautiful earrings a while back, but I thought about wearing possibly a bracelet to compliment them. But anyways, enough jibber jabber.. here is my final product!
It is just really simple, and I matched it with my real pearl earrings and you can't even tell a difference. I'm excited to wear it!

Finally! Centerpiece Mock-up .. Sort Of

So after my original centerpiece mock-up fiasco, my mom and I went in search of new ideas and inspiration. We finally found it at Hobby Lobby. They are taller/slimmer aluminum pails. We had to buy them in assorted colors since they didn't have enough of one single color, but that's no problem since my fiance was going to paint them white for me anyway. But here is the pail after it was painted..
The inside of them haven't been painted yet, but in due time!
Since the "theme" of our wedding is revolved around bright colors and gerbera daisies, I loved how these had incorporated flowers around of the rim to kind of "fit" our theme.

Here is a semi-mock-up of a centerpiece.. keep in mind that it still needs a lot of work!
This only has 6 daisies in it right now, but our final products will have at least 9 in them with 3 orange, 3 hot pink and 3 yellow. Also I'm thinking about sitting them on top of our cloth napkins and with some votives or colored stones sprinkled around it. I plan to fill the pails with colored stones to hide the flower foam at the bottom of it.
I will have a full centerpiece mock-up to post in a few weeks!

Monday, March 15, 2010

Cake Trial No. 1

My fiance and I just completed our first cake trial. Since we are on a tight budget, we have decided to bake and decorate the cake on our own. We baked it yesterday and let it sit overnight in the freezer to harden some. We didn't buy enough cake mix, so our layer is only half the size it should be, but we know for next time! This was our first time using fondant so that was definitely an experience. I LOVE to watch cake shows with Amazing Wedding Cakes, The Cake Boss and Ace of Cakes being some of my favorites. So I wasn't completely clueless as to what to do. I definitely need to practice some more though.

But anyways, without any further ado, here is our first cake trial...!

So not too terrible right? I think we did pretty darn good for our first time!
Just a reminder, here is the look we are going for..
 I think we are well on our way there! What do you think?

Monogram Table Runner - Check!

Boy am I glad this one is done. It took roughly 8-9 hours to complete. Anyways.. here it is! (The blurred out portions are where our names are displayed.)


I decided to add some artificial daisies to the monogram to give it some more dimension, and I added those with hot glue.

Materials Needed:
  • Table Runner (I ordered mine from linentablecloth.com and it is roughly 38" wide.)
  • Fabric Paint
  • Paintbrush (I used a small thin paintbrush to make the lines a lot cleaner.)
  • Enlarged Monogram (I got our monogram blow up at Kinko's for $3.00.)
  • Pencil
  • Wax Paper
  • Tape
Directions:

1. Start with a large flat surface and tape your enlarged monogram down onto the surface.
2. Lay your table runner over the enlarged monogram, and with a pencil, trace the monogram onto your runner. Don't press the pencil into the runner too hard, but enough so you can see where to paint. You don't want pencil lines to show on your final product.

3. Fold back your runner, and tape wax paper over your flat surface. You'll want to do this because the paint will leak through the runner and attach to the surface. Wax paper will prevent this from happening and will easily release the dried on paint.
4. Place your runner back over the wax paper area, and begin painting. I STRONGLY urge that you use fabric paint because it won't bleed, and the end result will look a lot better.Also, depending on your monogram, depends on how long it will take you to paint the entire runner. I had four colors in mine, and had to take breaks in between the colors to let them dry. Also mine involves many small details, so that also made the process longer.

Overall, I very happy with it. I can't wait to display it over our gift table at the reception. I also plan to keep it and turn it into a piece of wall art after the wedding is over!
Related Posts Plugin for WordPress, Blogger...