I am so excited to share with you all this new segment! My friend, Crystal, has asked me to help her plan some aspects of her wedding. I met Crystal through my best friend/Maid of Honor, and I offered my assistance to her if she ever needed any. Well as it turns out, she has asked me to help create her wedding invitations! So now I am on a new mission for a new wedding for a new bride and I couldn't be anymore thrilled to help her. I hope I will have more details of their wedding to share with you all. So far, here is what I have..
Crystal and her fiance, Brian, are planning a wedding for June 18, 2011 in my hometown. Their color scheme is going to be yellow and gray. I've noticed that yellow and gray is becoming a more popular scheme for weddings.
Isn't it gorgeous? So much in fact, I have asked my husband how he feels about it and now, we plan to use the same color scheme for our living room! But anyways, back to weddings. The day after Crystal enlisted my help on the design of her invitations, I immediately got to work. She had sent me an idea of a design that she liked from Merriment Design. The invitations are made of mostly fabric and since I'm not yet knowledgeable about the craft of sewing, I asked her if she would be against the idea of using cardstock to make a similar design for her invitations. Once I was given the go ahead, I went straight to work with supplies that I had on hand. So here is a mock up of what I came up with..
Now, keep in mind that this is rough mock up of a potential invitation for her, and the colors may end up darkening or lightening in terms of shade, but for the most part, I say that the mock up came out really well! It involves quite a bit of cutting of the individual shapes since they were all cut freehand, but the design definitely allows for variation. I suggested that we could make some invites like these and then for others, we could change the dominant color of the flower from yellow to gray and use a yellow button instead, or we could make a white flower. So many ideas are already flowing through my head, and I can't wait to finalize all the details with her!
Showing posts with label Invitations. Show all posts
Monday, September 6, 2010
Wednesday, August 18, 2010
Dudley's Dos & Don'ts of DIY: Invitations
When you begin planning your wedding, you begin scavenging through photos for inspiration for your own big day. Whether it be your dream wedding gown to those modern invites that you must have, I think it is important to stress that DIYing items for your wedding definitely can have its limits. So I have compiled my own, "Dudley's Dos & Don'ts of DIY," which I plan to incorporate as a new feature!
Invitations. The first impression that your guests will receive of your wedding. With many wedding invitation vendors charging as much as $4-$5 per wedding invitation, it has become more common for brides to opt to design and create their own. You don't need expensive calligraphers or diamond-finish cardstock to make your invitations spectacular, but there are a few key guidelines that you should follow when it comes to DIYing your invites.
DIY Invitations - Dos & Donts
DON'T: Be sloppy.
The use of different sized fonts can be perfectly fine for your invite, but do it the right way. An array of text, sizes and colors will have your guests dizzy before they even realize exactly what they're being invited to. Be more orderly when compiling your words.
DO: Clean and simple can go a long way.
Simple use of color, clean lines, simple graphic, and proper alignment will give your invitation a more professional look. Think modern.
DON'T: Attempt for cheap laughs and corniness.
A wedding is a union between two people joining their lives together. Not a circus. Yea, just don't ever do what the couple did below.
DO: Be Organized.
Organization is key when it comes to compiling the final product, whether that be with a pocket, ribbon etc. When your guests open your invitation for the first time, they don't want the little extras to fall out of the envelope.
DON'T: Pretending to be fictional characters instead.
No "Romeo & Juliet," "Bella & Edward," or "Elvis & Priscilla." Be yourselves.
DO: Be creative.
Add color. Add a vector. Now don't go nuts, but the days of plain, floral wedding invitations are GONE.
DON'T: Adding too much and being too busy.
No need to put three pictures of you and your honey on the invite, one will do. Your entire invitation doesn't need to be covered with something. Like I said previously, think clean and simple.
DO: Think outside the norm.
Belly bands are becoming more and more popular in the wedding invitation market, but who says that they have to be plain? This couple opted to incorporate their first names into their belly bands.
DON'T: Incorporating your registry.
Major no-no. Weddings are parties, but gifts are by no means necessary. By adding your registry information to your invites, you're suggesting to your guests that you expect a gift. Registry information should be told by word of mouth or can be displayed on your wedding website.
DO: Create a theme to carry out.
Themes are by no means mandatory, but a cute detail like this beaded band can be used in many different ways throughout your wedding. It will give your wedding a more chic and modern feel.
DON'T: Misspell or be grammatically incorrect.
Spell check everything, and then have a few friends or family members check everything again. Typos can be quite embarassing too, so make sure to double check and re-check everything!
And there you have it.
Don't go crazy with your invitations, but by following simple guidelines like these, you will make your invitations something to remember and treasure.
Do you have any "Dos & Donts," to share?
Any pictures of past weddings where there was a major DIY do or dont?
If so, email them to me! I want to see them! They may be featured!
Saturday, April 24, 2010
Invitations are DONE!
I'm so relieved that these are finally done. I truly couldn't be any happier with them, and I absolutely love them. My fiance and I had an invitation assembling session yesterday for roughly 3 hours, and then we made a trip to the post office to send them off!
Ready to be mailed! YAY!
Wrap-Around Labels - Check!
These were super easy to complete. I used another handy-dandy Xyron machine, except a smaller one. It is the 1.5" Xyron machine and it can typically be found for less than $10 (even cheaper if your sign up for Hobby Lobby weekly emails and use a 40% off coupon).
Making these was quite simple, and here is how I did it..
Directions:
Open up an 11" x 8.5" document in Microsoft Publisher.
My invitation envelopes measured at 5.25" x 7.25". Insert a text box (this will be the box that indicates the label as a whole.) I made the label 7.25" inches in length since it would still cover a majority of the front of the envelope and stll left some label to wrap-around to the back.
Since my Xyron machine can make stickers up to 1.5", I decided to make my label 1.5" in height. Overall, my label measured at 7.25" x 1.5", and this is what my text box was sized to.
Insert a text box where your guests address will be, and insert a textbox where your return address will be. The return address portion should be on the far left and will be the portion of your label that get folded around to the back of your envelope.
Insert any pictures, wallpaper, designs that you wish.
Type in your return address, and begin typing in your guests address. I was able to fit 6 wrap-around labels onto an 11" x 8.5" document. It will be easier to make the labels if you "group" together your items in Publisher. You can do this by pushing "Ctrl" on your keyboard, then begin clicking on your items in your label. They will all become highlighted and then you will be given the option to "Group."
I printed them off and cut them out with my paper cutter. Then, I sent them through my Xyron machine.
And here is what they looked like when added to an envelope..
Belly Bands - Check!
FINALLY! I finished these little suckers. And here they are!
Now for my directions..
Materials Needed:
Directions for Belly-Bands
Now for my directions..
Materials Needed:
- Ribbon
- Xyron Machine or some type of adhesive
- Tape
- Cardstock
- An invitation
- Scissors
Directions for Belly-Bands
- Cut your ribbon strips to the size desired to fit around your entire invitation shortways. Mine measured at 5.25", so I cut my strips to 5".
2. Wrap tape around the ends of your ribbon.
3. Place the ribbon underneath your invitation evenly.
4. Place a piece of your already measured out cardstock onto the center of your invite and pull one end of your ribbon onto the cardstock. Tape the ribbon to your cardstock.
5. Tape the other end of your ribbon onto your cardstock.
6. Remove the sticker paper from the back of your monogramed cardstock and position it on the taped cardstock.
Sunday, April 18, 2010
Part One of the Belly Bands
I finally began my belly bands today. I had been putting them off because I lacked any sense of motivation, but I want to get these invites out by Wednesday, so I kicked my butt into gear! Do you own a Xyron machine? If not, I highly recommend them because they're awesome. It is helping me out tremendously in assembling my belly bands and you'll see why in my next entry. Anyways, check out my progress!
A here's a thumbs up for a job well done! Now, I am off to eat some Taco Bell!
Saturday, April 10, 2010
Photo Stamps!
Finally! A new post! This isn't so much a DIY project since all I really did was just upload a photo, but none the less, I present to you all.. my envelope photo stamps!
Snapfish was having this awesome sale on photo stamps a few days ago, and I was able to get these stamps for $.35 cents each (Thanks Ashley!) after all of the discounts came through. Love them!.
Saturday, March 27, 2010
Invitation Re-Design!
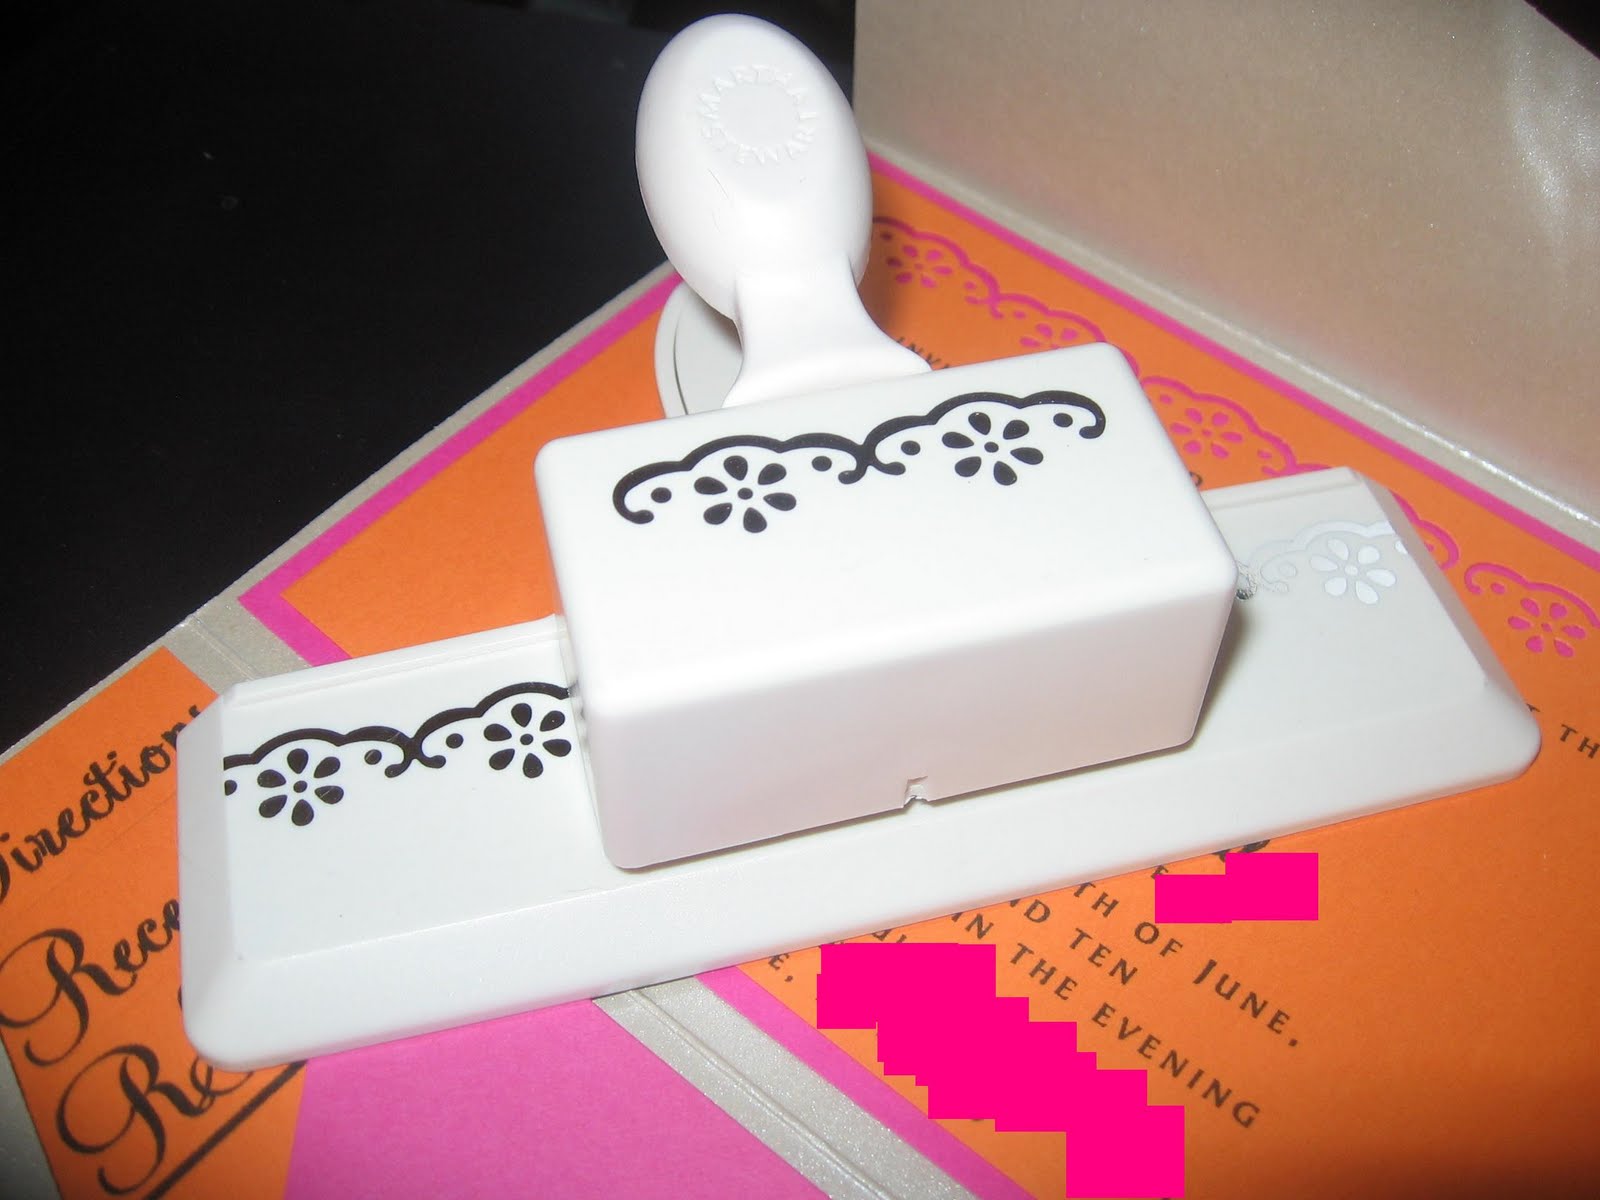
So last week, I was on Excel checking out my guest list for the wedding. I had inserted a formula a while back to count up how many invitations that I needed to make. The total came out to be 39 invitations total. So I made 39 invitations. Well last week, I decided to reprint my guest list and count up by hand how many invites I needed, and I actually need 58 invitations. CRAP. I should have done it that way from the beginning and I still have no idea how Excel came up with 39 invites. So basically, earlier this week, I needed to get started on embossing 20 or so more invites. I was doing them, and was about to start my 5th one when I caught myself looking at them, and I was unhappy. I want to be proud and happy about our invitations. I know they're just going to be thrown away by our guests, but I want to keep a few of them and frame them. I want to look at them 10, 20, 30 years from now, and still love them. So on Wednesday of this week, my fiance and I went out to Hobby Lobby in search of some inspiration. Some things we wanted to keep the same still..
What we kept the same:
Honestly, these pictures do them absolutely no justice whatsoever. But in person, they are absolutely gorgeous and I am so happy with them! I feel like this huge weight has been lifted off of my shoulders because down deep, I still didn't want to use the other invites, but since I put some much time, money and effort into them.. I was just going to settle. My advice: DON'T SETTLE! Take pride in your work, and be happy with your results. You don't want to have any regrets about your projects. So how do you like them!?
PS. I love how our new paper punch incorporates flowers that are almost identical to the fondant flowers that we are going to create for our cake!
What we kept the same:
- The hot pink invitation envelope
- The hot pink RSVP envelope
- The sand metallic pocketfolds
Honestly, these pictures do them absolutely no justice whatsoever. But in person, they are absolutely gorgeous and I am so happy with them! I feel like this huge weight has been lifted off of my shoulders because down deep, I still didn't want to use the other invites, but since I put some much time, money and effort into them.. I was just going to settle. My advice: DON'T SETTLE! Take pride in your work, and be happy with your results. You don't want to have any regrets about your projects. So how do you like them!?
PS. I love how our new paper punch incorporates flowers that are almost identical to the fondant flowers that we are going to create for our cake!
Wednesday, March 24, 2010
Made a Huge Decision Today..
After embossing and assembling about 70% of our invites, I have made the decision to change them. I basically stuck with them this long because I had put so much work in them, but when I looked at them and thought about them, I wasn't happy at all. Sure, they're just going to be thrown away, but I want to be happy and proud of them. Plus, I plan to keep a few of them for a shadow box project after the wedding, and I want to look back at them years from now and still love them. So my fiance and I just spent the past hour in Hobby Lobby looking for inspiration, and my fiance found something that we both love. Maybe now I will actually be happy and excited to complete our invitations instead of just staring at what we have now and not wanting to finish them at all. I'll have a mock-up to show you this weekend!
Sunday, February 21, 2010
Invitation Inserts - Check!
So I've finally marked off another DIY on my To-Do list, and this one has been a major pain! It has mostly been a pain because of me and my obsessive-compulsive nature, as well as my indecisiveness. But after messing around with these for about 3 or 4 months now, I've finally figured out how I want to have them look! Since our wedding colors are hot pink and tangerine, I wanted to incorporate both colors into our invites, and so far I had only used hot pink. So, why not use the tangerine in the inserts?! Here they are:
I wanted them to have a layered look, as well as incorporate our tangerine color, and I think I pulled it off! Another thing that I found to be so difficult was the design/look of the inserts. I LOVE my Upsy Daisy stamp design and I wanted to incorporate it somehow. However, the stamp is rather large and the inserts are smaller. So I was able to use my embossing ink from my embossing project, and produce a watermark on my inserts like so..
I love how they turned out! No more stressing over these! Well at least at far as design =) I didn't put a watermark on my directions insert since it has such a large map on it already. I'm really proud of this map too. I worked quite a few hours on it, and it came out great. Here is how I made the map..
Directions on Making a Map:
I wanted them to have a layered look, as well as incorporate our tangerine color, and I think I pulled it off! Another thing that I found to be so difficult was the design/look of the inserts. I LOVE my Upsy Daisy stamp design and I wanted to incorporate it somehow. However, the stamp is rather large and the inserts are smaller. So I was able to use my embossing ink from my embossing project, and produce a watermark on my inserts like so..
I love how they turned out! No more stressing over these! Well at least at far as design =) I didn't put a watermark on my directions insert since it has such a large map on it already. I'm really proud of this map too. I worked quite a few hours on it, and it came out great. Here is how I made the map..
Directions on Making a Map:
- Using Google Map, type in the location of your wedding location(s). Zoom in.
- Press the "Print Scrn" button on your keyboard to copy your image.
- Open Microsoft Powerpoint, and paste your image on to a slide.
- Insert lines, images etc., and outline the streets, landmarks, rivers and locations of significance that will help your guests find your location. I included a river, a park, and a landmark on mine to help.
- Label accordingly. Maybe even make a Key.
- Now with your outlines, labels and images in place, click on the pasted Google map, and delete it. You'll be left with your map.
Monday, January 18, 2010
Emboss Invites - Check!
Hello! With having MLK Day off from school and work, I decided to try my hand at another DIY project. My invites are without a doubt my biggest DIY because I have so much I want to do with them. I printed them all and cut them all with my brand new paper cutter (which rocks btw!), and now wanted to emboss them with a stamp design. I looked and looked online for months for potential ideas of what to add to our invites to dress them up a little, but since they're hot pink, we didn't have a lot of options. That was until, I learned about embossing. To be honest, I was pretty nervous to attempt it, but after a few months of trial and error, I was finally ready to tackle our invites. Now I want to share with you how to heat emboss!
Materials Needed:
4. Apply the embossing ink to the stamp.
6. Press the stamp on the cardstock/paper.
Materials Needed:
- Paper/Cardstock
- Embossing powder
- Embossing ink pad
- Heat gun
- Rubber stamp
- Embossing buddy (optional)
- Stamp-A-Ma-Jig (optional)
- Miniature paint brush/duster
2. Optional Step: With your embossing buddy, rub the area where you place to emboss. I found the embossing buddy to be very beneficial because its purpose is to keep the embossing powder from sticking anywhere else other than on the embossing ink.
3. Collect your stamp and your embossing ink. Tip: The embossing ink will work best if left upside down when not in use.5. Optional Step: Using your Stamp-A-Ma-Jig, line the cardstock/paper up and place the stamp inside the Stamp-A-Ma-Jig. I found this tool to be very helpful since I was able to line up the stamp perfectly each time.
7. Pour the embossing powder onto your image.
8. Spread the powder out with your finger to cover the entire image.
9. Shake off any excess powder into a container.
10. Optional Step: To remove any left-over powder and to clean up your image, use a small paintbrush or duster to remove any powder not wanted. Once removed, blow off any powder.
11. Once you have your image the way you want, turn on your heat gun and heat the stamped image. Once the heat gun is fully warmed up, the powder will begin melting and rising.
12. All done! Pat yourself on the back for a job well done!
Embossing is such a great additive to add a little extra flavor to any paper project that you are working on. Just make sure to practice with your stamp and the technique plenty before jumping into embossing any invites, programs etc.
WARNING: Your working area may look like this while working. Big mess!
Subscribe to:
Posts (Atom)